Run a Virtual Machine with VirtualBox on a Hackintosh
You are running on a OS X à la Hackintosh ? You have a « VT-x is not available. VERR_VMX_NO_VMX » when you start a virtual machine ? Do not panic !
Under the ~/Library/VirtualBox/Machines directory you will find a folder for each virtual machine you have created. Within this directly you will find an XML file with the machine settings.
Update: You can now just type in your terminal: VBoxManage modifyvm <VMname> --hwvirtex off (change <VMname> with your VM name)
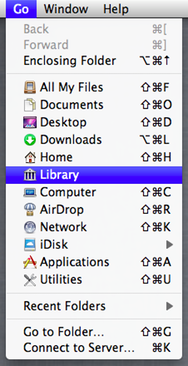
So, in your « user folder » (~/), there will be a Library folder, hidden in OS X Lion, so to see it, open the Finder, in the « Go » menu, hold ⌥.

Inside that Library folder, there is a folder called VirtualBox, which contains a Machines folder. In each VM folder, open the *.vbox file using a text-editor. It’s a XML file.
It looks like:
<?xml ...
    <VirtualBox ...
        <Machine ...
            <CPU count="1">
                <HardwareVirtEx enabled="true" ... />
            ...</pre>
Exit Virtual Box, change this « true » to « false » and Save. Restart Virtual Box and (or open it if you had it closed) and the hardware virtualization extensions will be disabled.

Seems like a clear bug with VirtualBox, being that the setting is grayed out in the GUI but you can change it in the XML config file and that fixes the problem.